


Connecting a fiber optic cable to a router involves a few key steps and specialized equipment. Here’s a simple guide to help you through the process:
1. Check Your Fiber Optic Equipment
Before you start, make sure you have the necessary equipment:- Fiber Optic Modem (ONT – Optical Network Terminal): This device converts the optical signal from the fiber optic cable to an electrical signal that the router can understand.
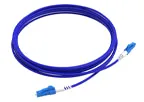
- Kabel światłowodowy: This is provided by your Internet Service Provider (ISP) and is usually pre-terminated.
- Router: A standard router that can be connected to the ONT via an Ethernet cable.
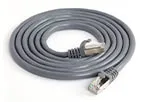
- Ethernet Cable (Cat5e or higher): Used to connect the ONT to your router.
2. Locate the Fiber Optic Terminal
Your ISP will typically install a Fiber Termination Point (FTP) or a Fiber Wall Outlet. This is where the fiber optic cable from outside your house connects to your equipment inside.3. Connect Fiber Optic Cable to the ONT
- Insert the Fiber Cable: The fiber optic cable connects directly into the ONT provided by your ISP. Make sure to carefully insert the fiber cable into the proper port labeled “Fiber” or “GPON.”
- Power Up the ONT: Once the fiber optic cable is connected, plug the ONT into a power source. The ONT will convert the optical signal into an electrical signal for your router.
4. Connect ONT to Router
- Use an Ethernet Cable: Take an Ethernet cable (Cat5e or Cat6) and connect one end to the Ethernet port on the ONT. The Ethernet port may be labeled as “LAN” or “GE” (Gigabit Ethernet).
- Connect to Router’s WAN Port: Plug the other end of the Ethernet cable into the WAN or Internet port on your router. This is typically a different color (blue or yellow) than the other ports.
5. Power Up the Router
- Turn On the Router: Once everything is connected, power up your router by plugging it into a power source.
- Wait for Connectivity: Your router may take a few minutes to establish a connection with the ONT and synchronize with your ISP.
6. Configure the Router (if necessary)
- Log into the Router: Open a web browser and enter the router’s IP address (usually 192.168.1.1 or 192.168.0.1) to access the router settings.
- Enter ISP Credentials: Depending on your ISP, you may need to enter a username and password or configure other settings (like VLAN tagging or PPPoE).
- Test the Connection: Once configured, check the status in your router’s admin panel or run a speed test to ensure that your fiber optic connection is working.
7. Check the Fiber Link Status
- Indicator Lights: Most ONTs and routers have indicator lights for the fiber connection. A steady light means the connection is active, while a blinking light could indicate a connection issue.
8. Set Up Wi-Fi (Optional)
If you’re using a wireless router, configure your Wi-Fi settings (SSID and password) through the router’s admin panel so that devices can connect wirelessly.Summary of Connections:
- Kabel światłowodowy → ONT
- ONT Ethernet Port → Router WAN Port
- Router → Power On